Product Detail
:::📌
When customizing the Product Card, please note that:
Click on a product on the simulator to open the Product config
For the product cards on Home screen, you can customize in Product Horizontal and Vertical Layout widget of HOME LAYOUT by going to Home tab → scroll to HOME LAYOUT on the right hand side → add new Product Horizontal or Vertical Layout.
The Product Card Customize opened from Features is mainly applied for Product List screen of the app.
To hide the Out-of-stock products, please go to Features → open General → select Miscellaneous → turn off Show Out-of-stock Products and click Apply.
:::
To enable the Downloadable product which is used for some business like **Download the Digital Assets, Download E-Book**, etc.
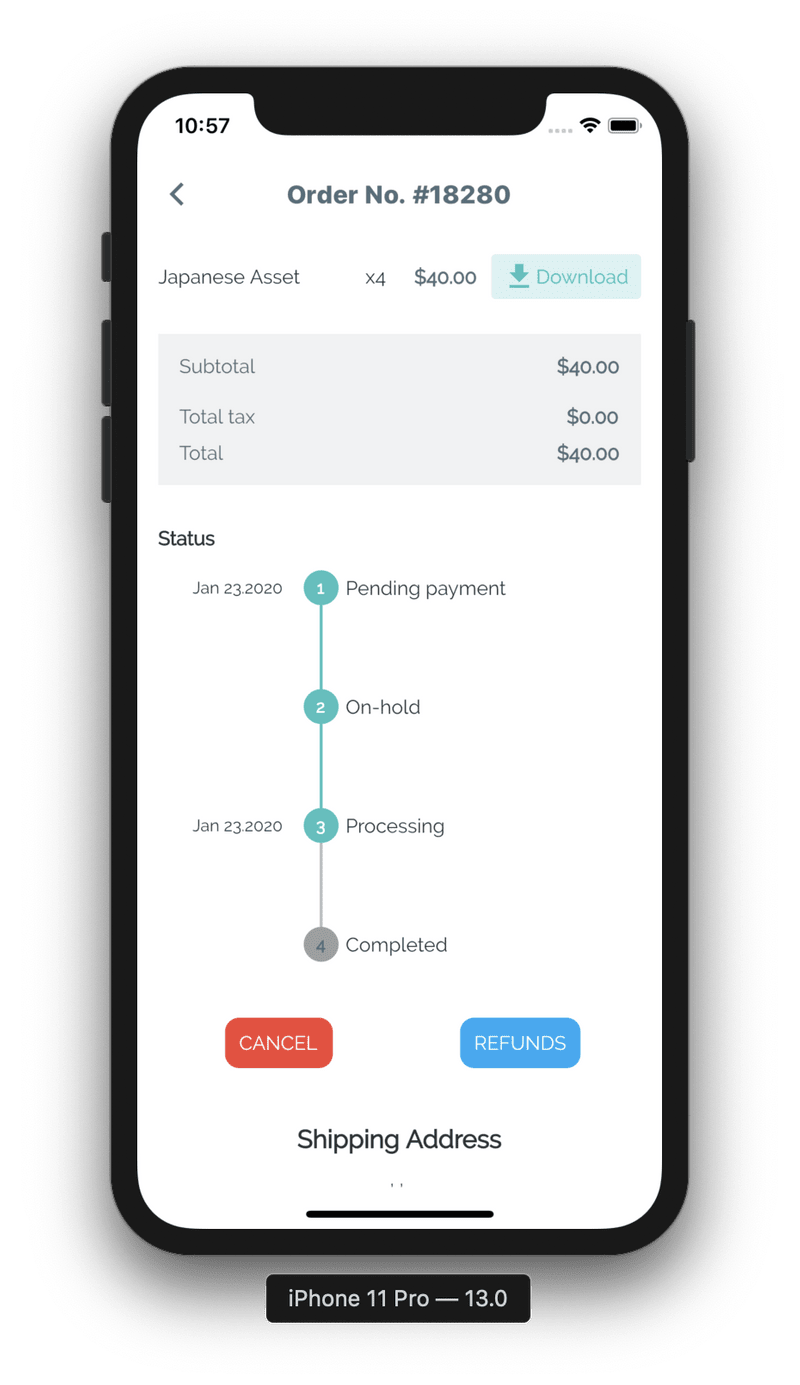
The screen of the downloadable product will be displayed as normal, but once the user has purchased your product successful, the download link will display on the **Order Detail screen**:
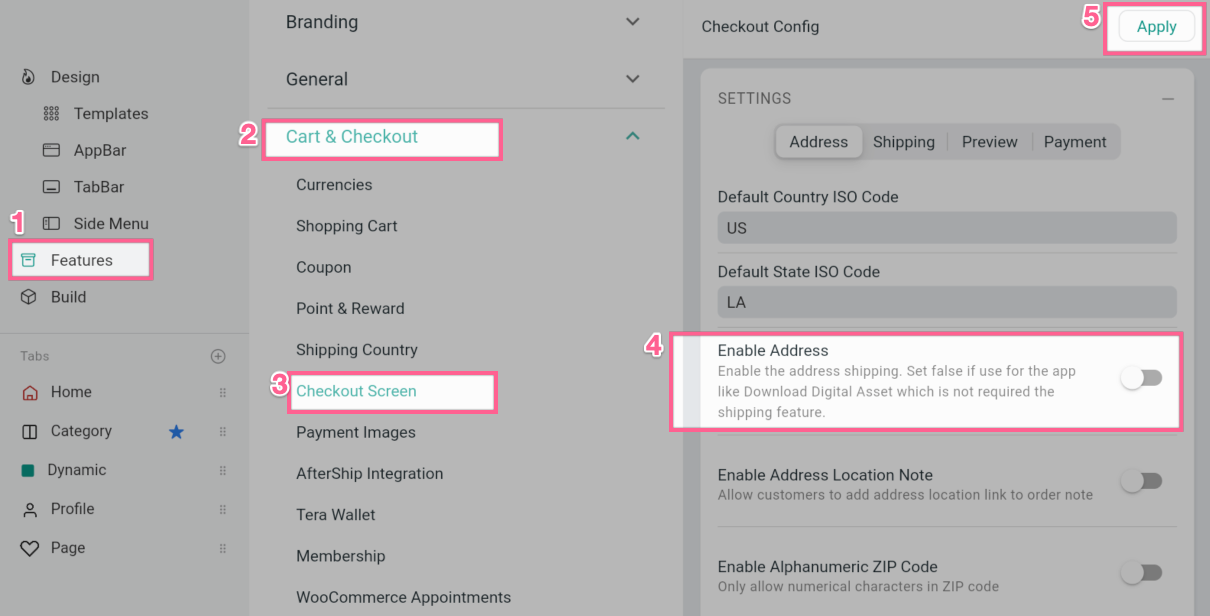
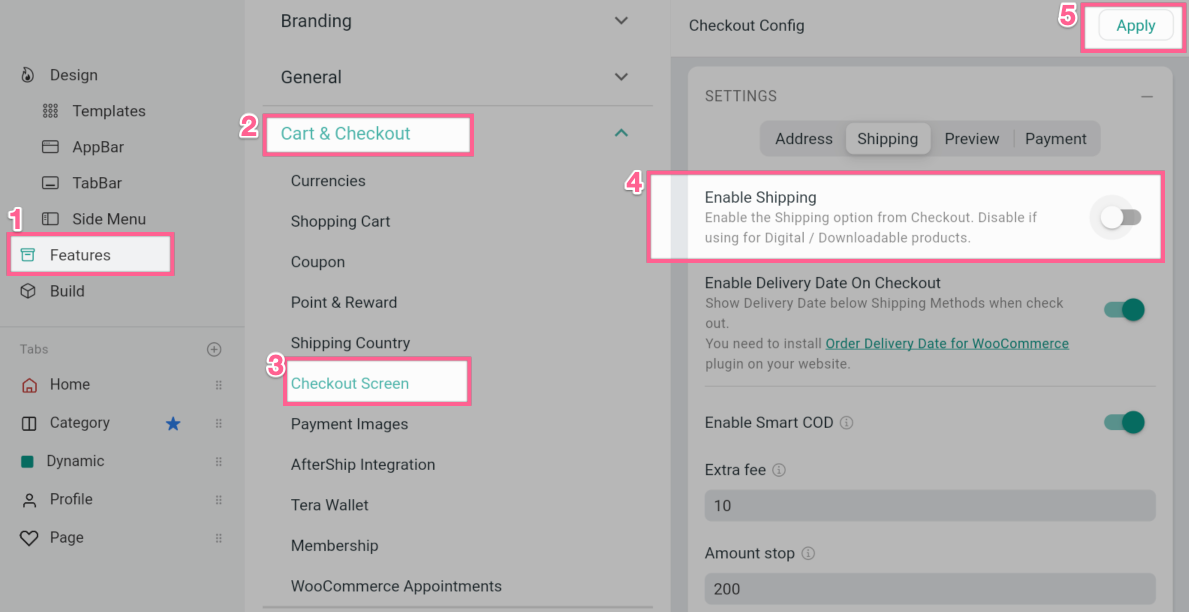
As the download will not require the Address and Shipping , so **you need to disable these screens**.
Woo Product Add-Ons & File Upload
The Product Add-Ons plugin is supported on WooCommerce apps:
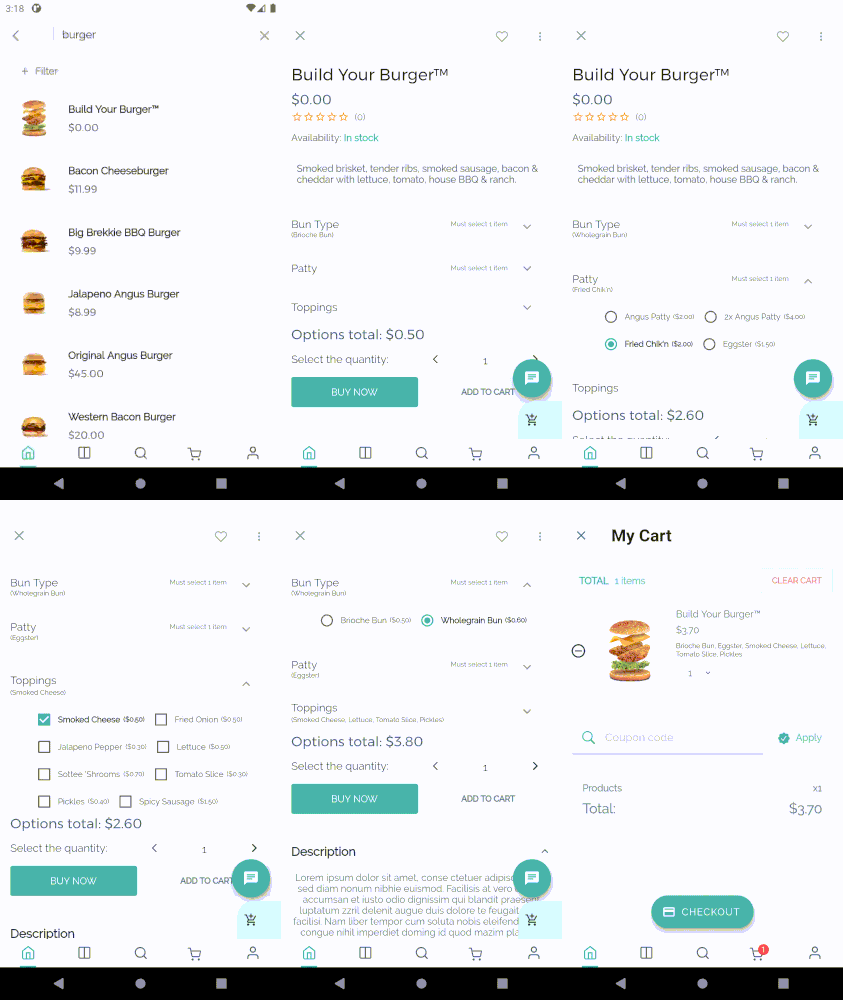
Then you can choose to create either Global Product Add-Ons or Per-Product Add-Ons by following [their documentation](https://docs.woocommerce.com/document/product-add-ons/):
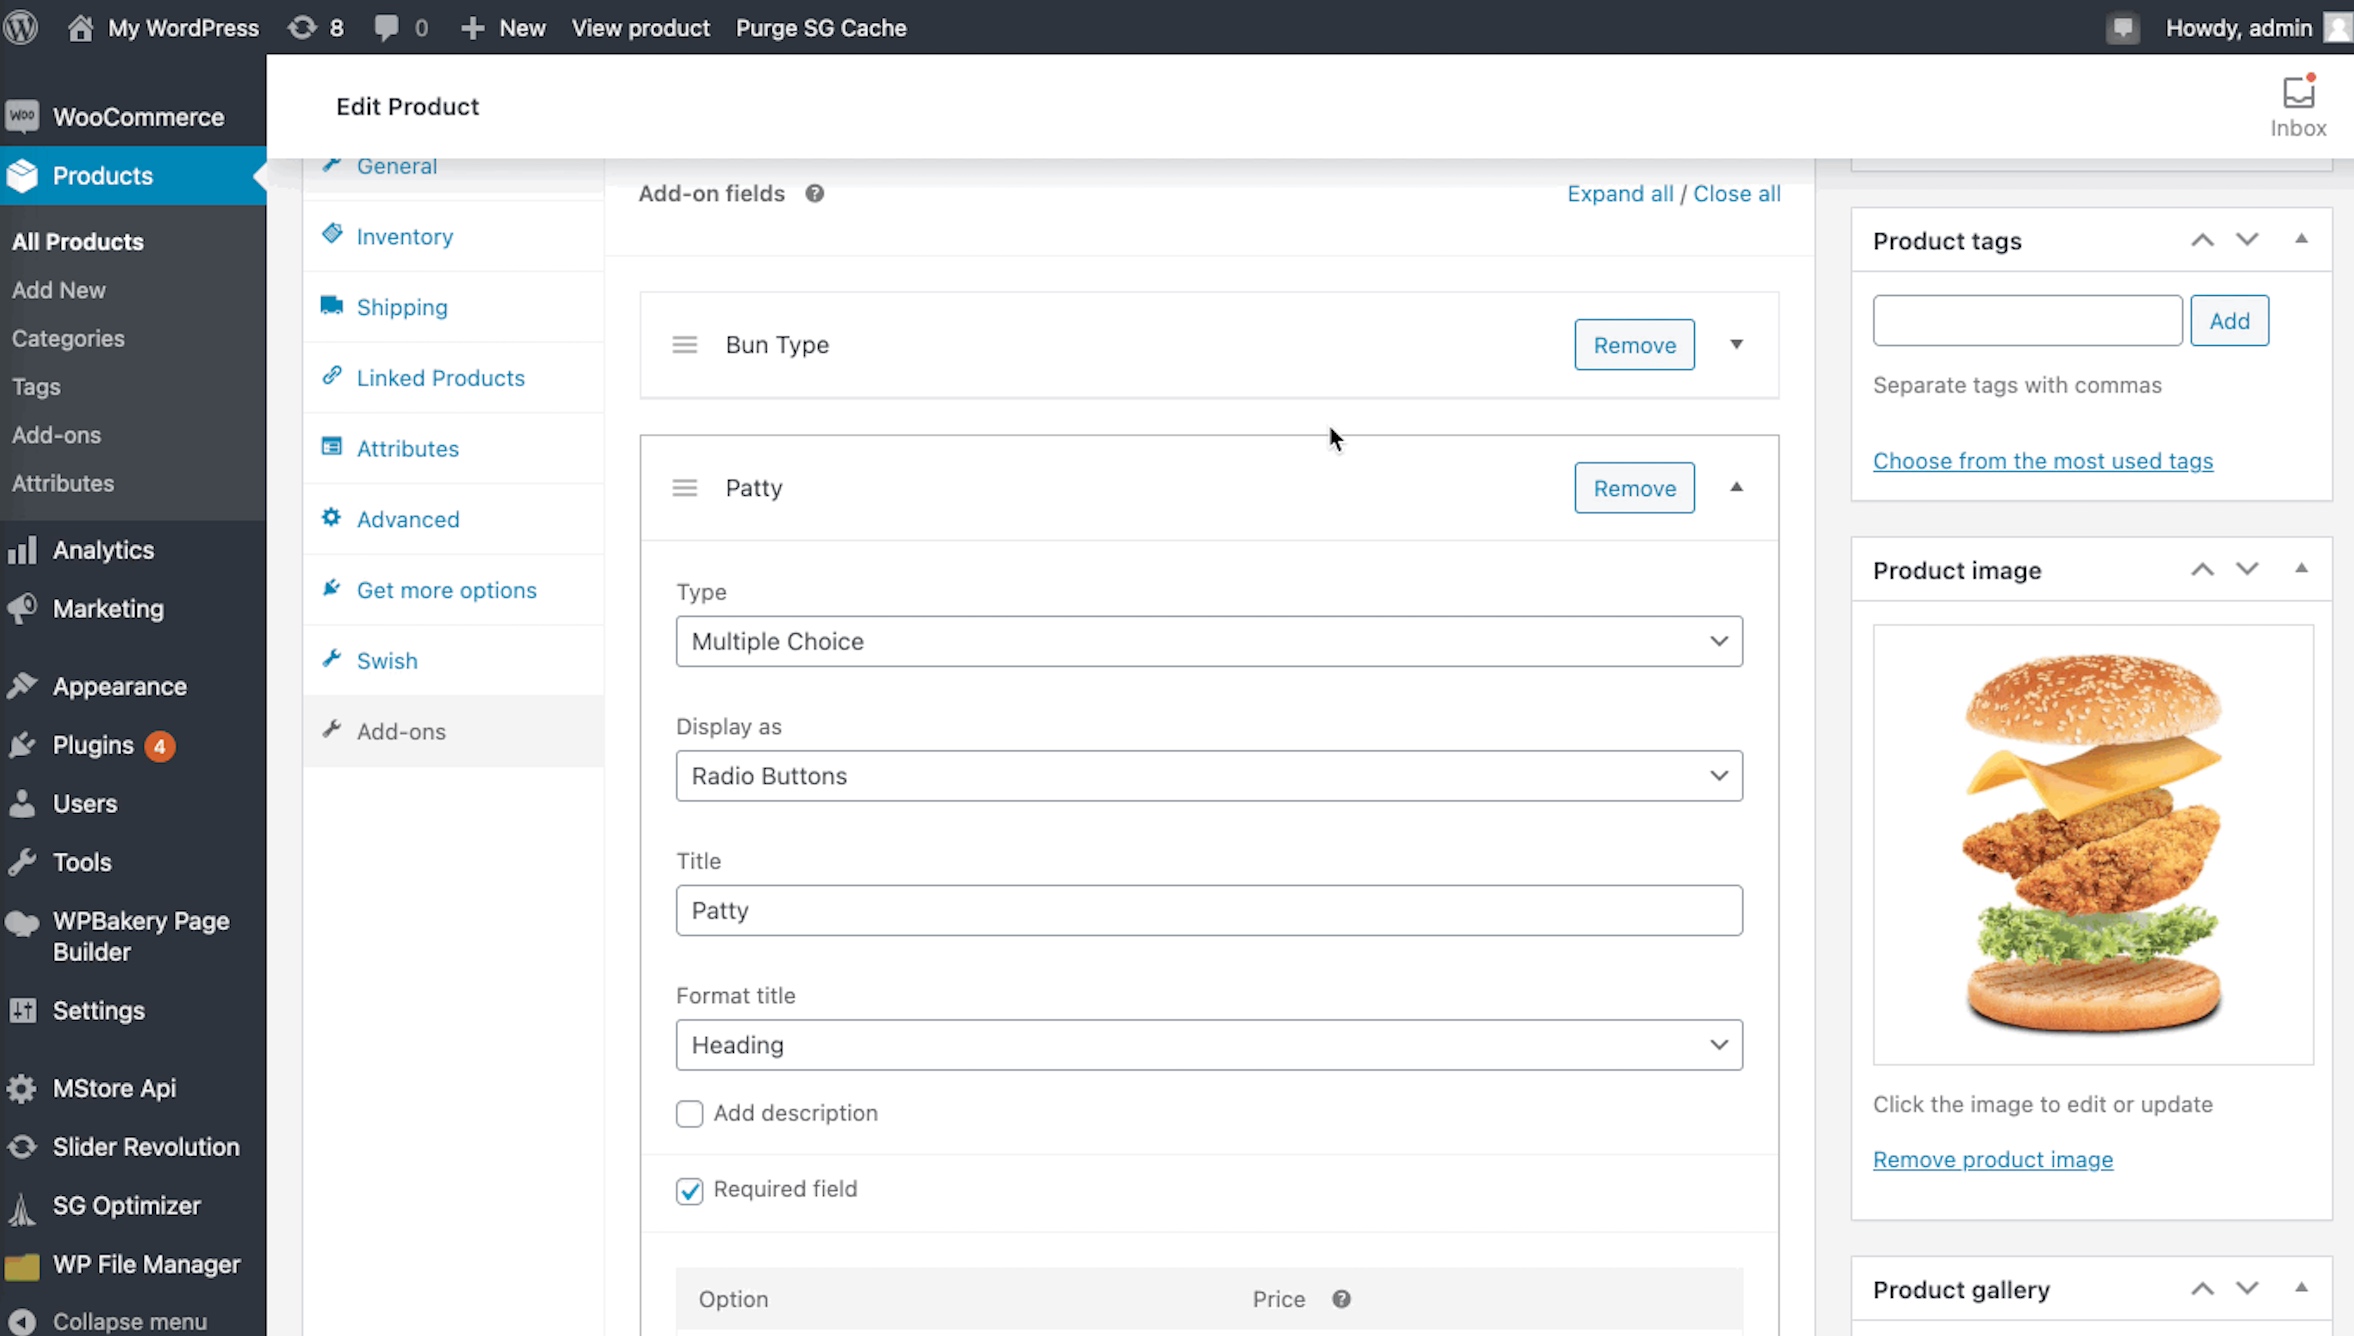
**Supported types:** _Multiple Choice, Checkboxes, Short Text, Long Text, File Upload, Heading._
Other types are not supported.
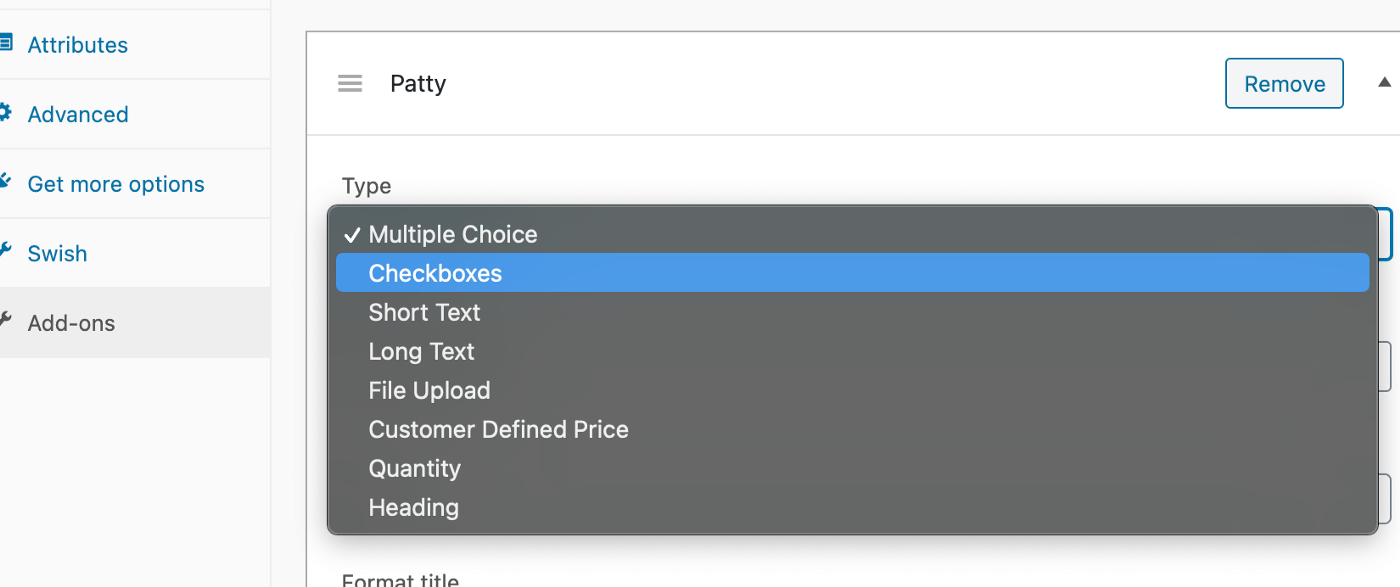
For more configuration, please use the Builder tool by following the steps below:
1. Open your app on the Builder tool
2. Go to **Features → General → Product Add-Ons**
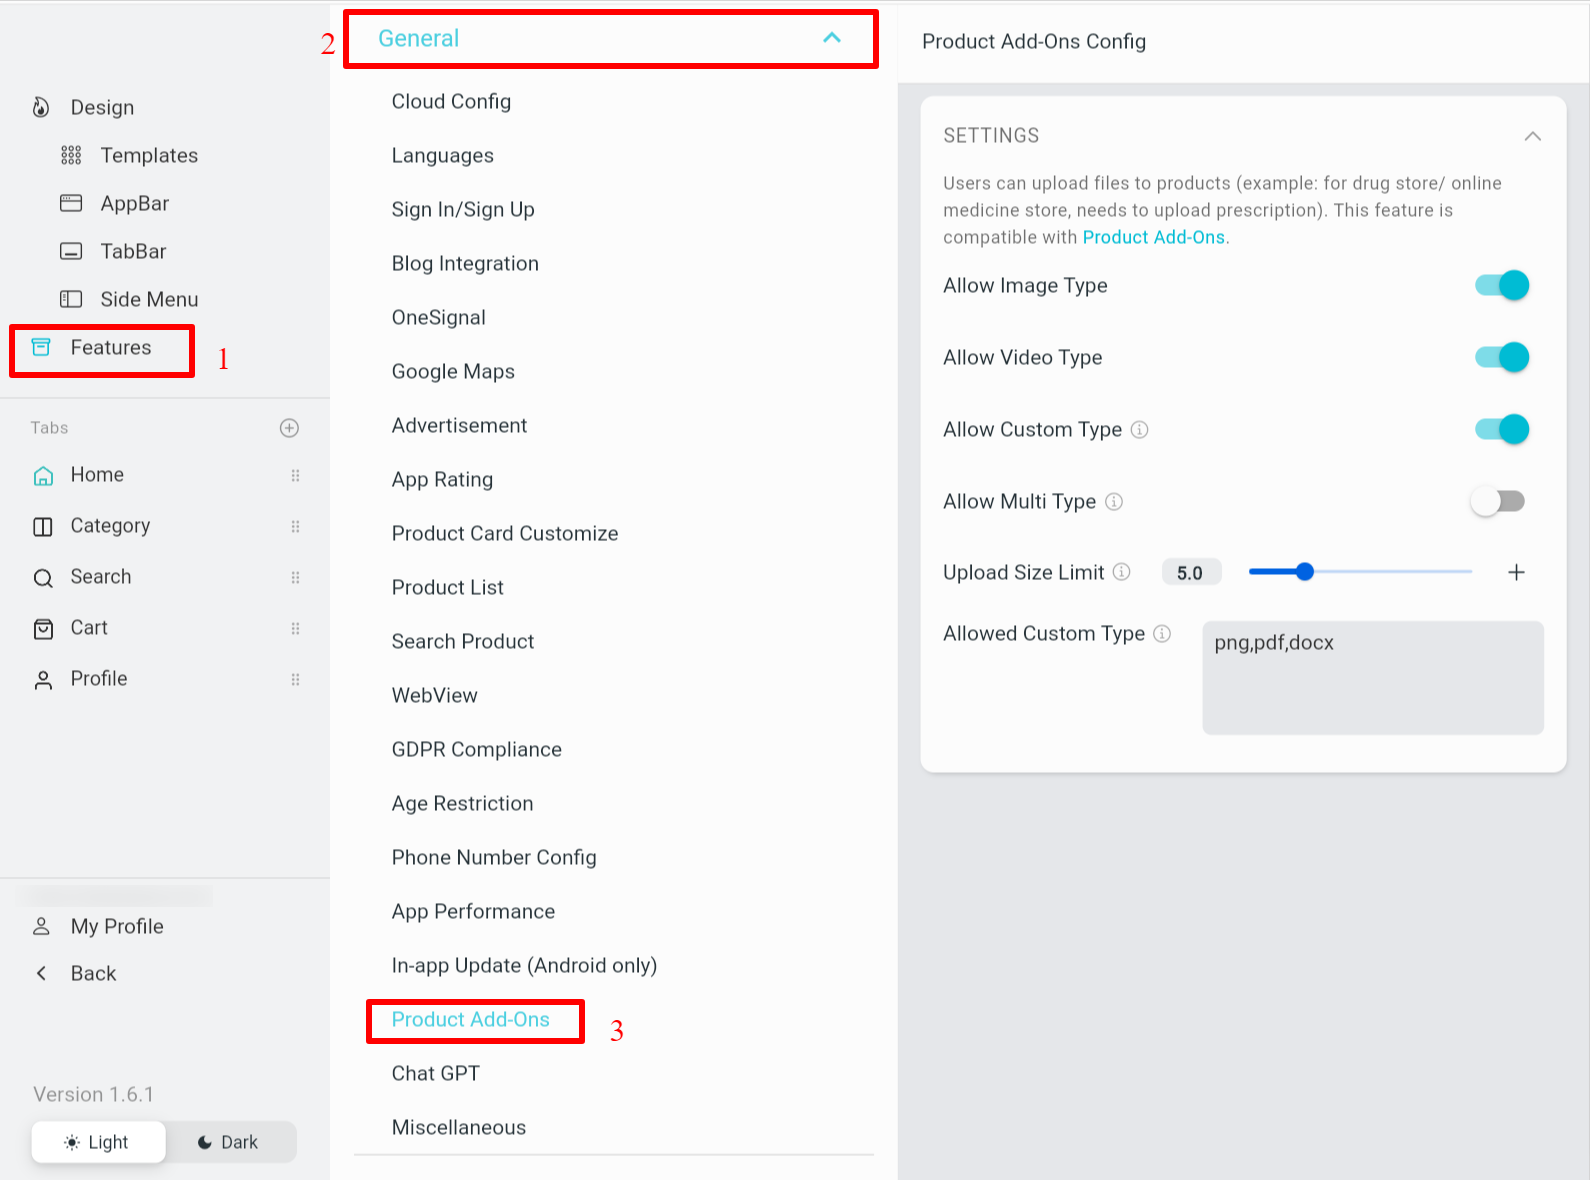
3. Edit
4. Click **Apply** and **Save**
:::📌
**Please note that the Product Add Ons that only compatible when** [EnableOnePageCheckout](/feature-multi-payment) is disabled.
:::
This feature is currently compatible with all supported websites (except for Prestashop and Notion)
- The app is supporting many types of product variant layouts: `color`, `box`, `option` and `image` type (the default product variant is `box` type).
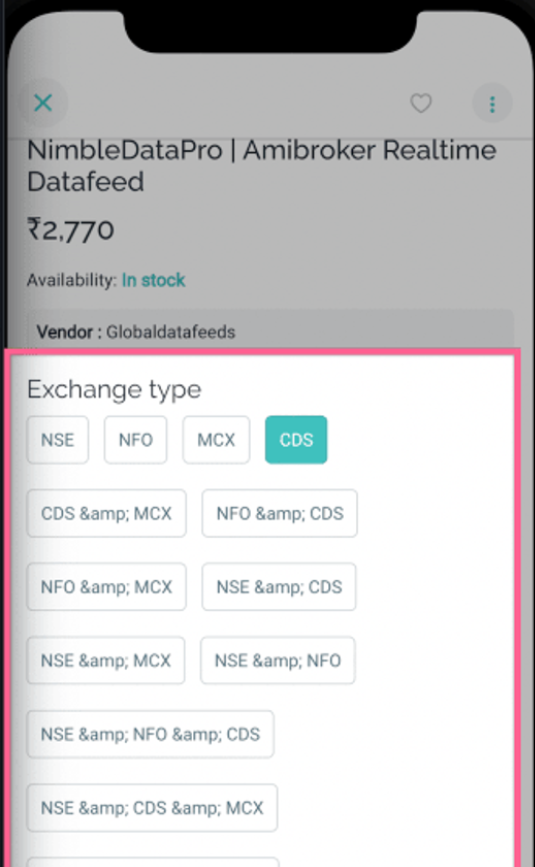
- To change to other types of layout, please make sure to get the slug name for the product Attribute name.
1. Open your app on AppBuilder
2. On the simulator, click on any product
3. On the right hand side, scroll to **PRODUCT VARIANT LAYOUT**
4. Click the **+** button to add new
5. Input attribute slug name click **ADD**
6. select the **Layout** for the new **Attribute Slug**
7. Click **Apply** and **Save**
## 7. Variation Swatches
This feature is currently compatible with WooCommerce. It is compatible with free [WooCommerce Variation Swatches](https://wordpress.org/plugins/woo-variation-swatches/) plugins, or it could work with any **Image Swatch** plugins by copying the Image URL into Term Description as shared from the below screenshot.
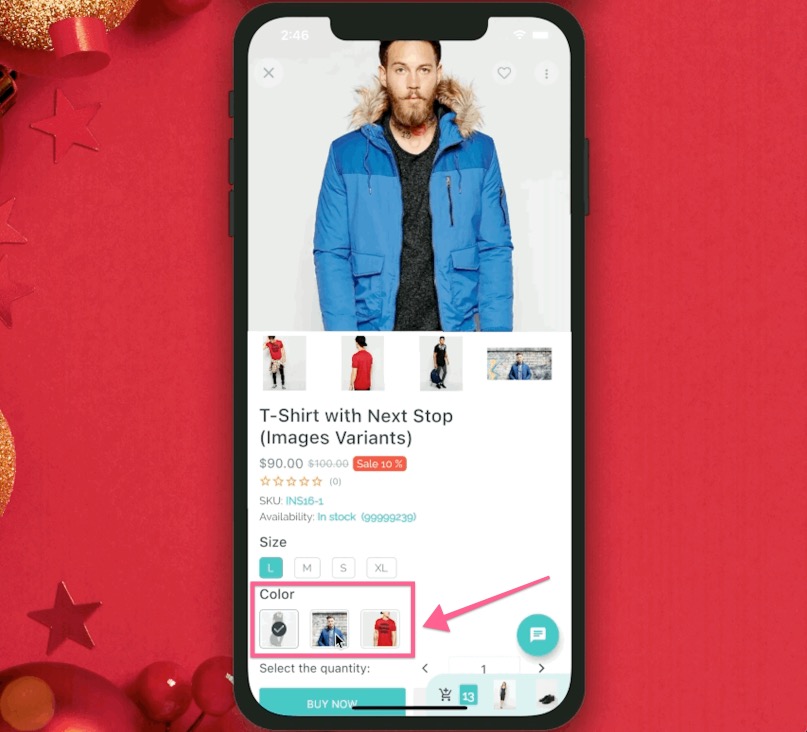
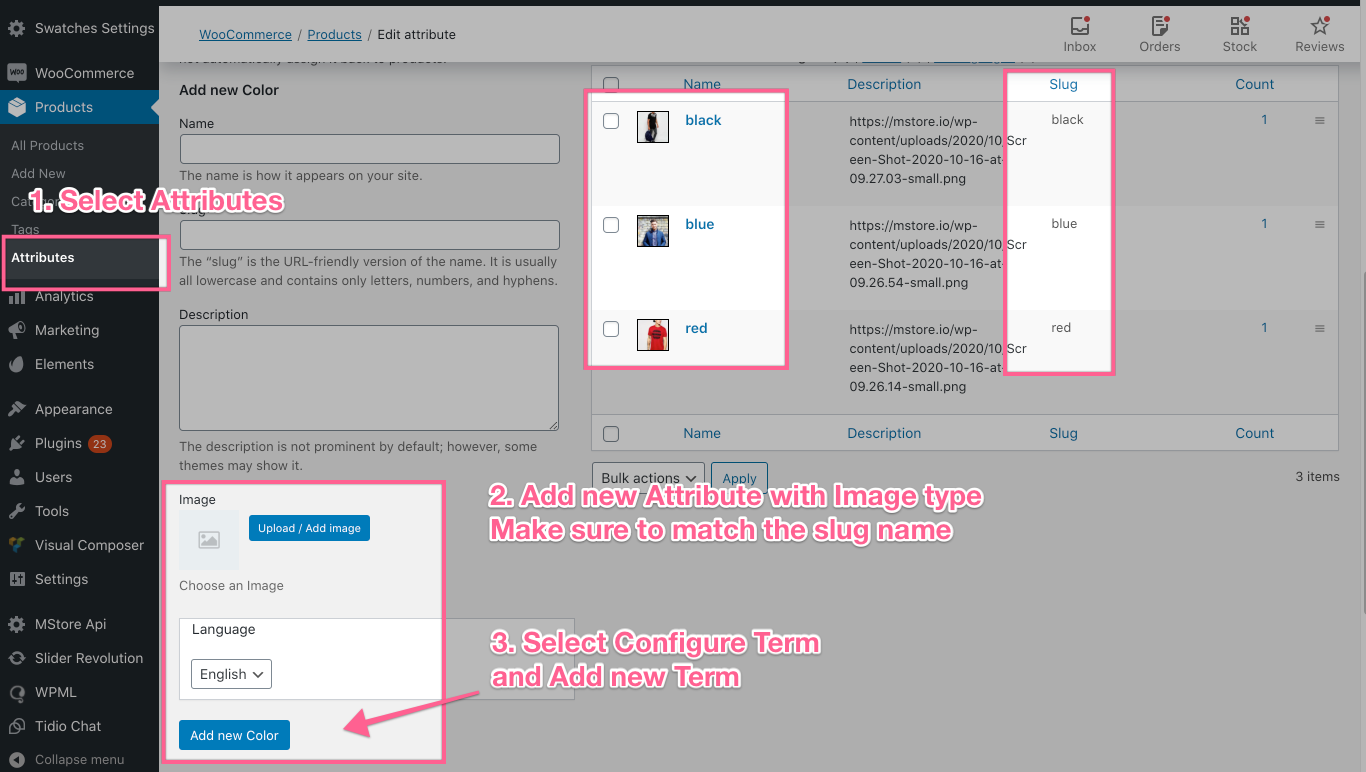
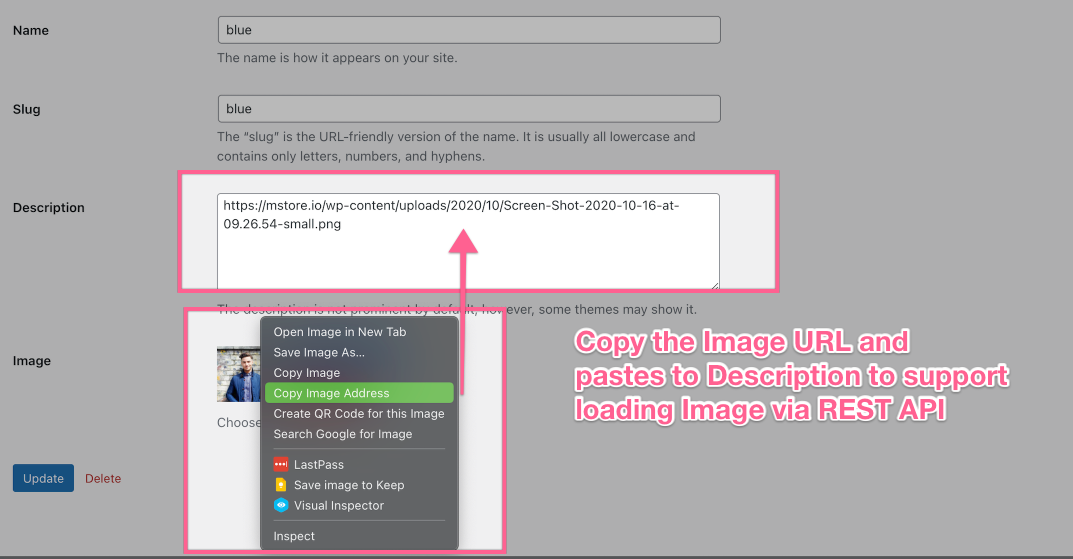
Finally, open your app on AppBuilder. Go to **Product Detail** config and select layout **Image**.
This feature is currently compatible with WooCommerce or Blogs/News Wordpress websites.
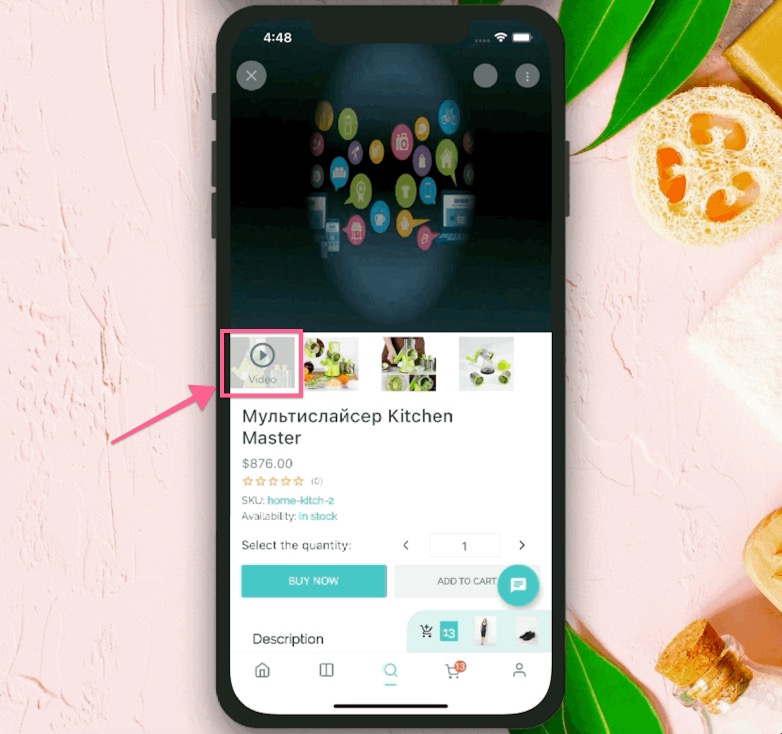
To show videos on Product Detail screen:
1. Install one of the 2 video plugins below on your website:
- [WooCommerce Featured Video](https://wordpress.org/plugins/woo-featured-video/)
- [YITH WooCommerce Featured Video](https://wordpress.org/plugins/yith-woocommerce-featured-video/)
2. Open your app on AppBuilder
3. Click on any product on the simulator
4. Enable **Show Video**
5. Click **Apply** and **Save**
## Rating & Review


The feature supports the **Rating Count** and **Reviews** performance of a product on the Product Detail screen.


Steps:

1. Open your app on AppBuilder
2. On the simulator, click on a product to open the **PRODUCT** config.
3. Turn on **Enable Review** and click **Apply**.
4. Go to **Features → open**  select **Color Override**.
5. In **Rating Color**, change new colors for the stars and linear progress bars
6. Click **Apply** and **Save**

## Photo Review


This feature allows customers to post reviews including product Images on the `completed` Order Detail Screen. It is currently compatible with WooCommerce


Steps:

1. Install the plugins: [Photo Reviews for WooCommerce](https://wordpress.org/plugins/woo-photo-reviews/) on your website
2. Open your app on AppBuilder
3. On the simulator, click on a product to open the **PRODUCT** config.
4. Turn on **Enable Review**
5. Click **Apply** and **Save**

## Product Review Approval


You can choose to show the review of the new products automatically or manually.

1. Open your app and go to **Features**
2. Open **General** → select **Miscellaneous**
3. Enable **Product Review Approval** to show review right after the review is submitted
4. Click **Apply** and **Save**
:::📌

Make sure the feature has been available from your website by installing [**Woocommerce Brand**](https://woocommerce.com/products/brands/) plugin. Then, create brands for your store with name, description, and image.

:::


To show the Brand name and Brand Image on the Product Detail Screen

1. Open your app on AppBuilder
2. On the simulator, click on any product
3. On the right hand side, enable **Show Brand**
4. Click **Apply** and **Save**